|
|
|
![]()

![]()

last update: 05.20.02
This is Rockette, she's on full display in the extensive pictures below. Most current photos appear at the top.
NEW: to speed up the time it takes to load the picture intensive content on this page, I have decreased the size of the images, but some of them can be enlarged by clicking.
 |
 |
 |
 |
If you're intrigued by the roll cage then see my roll cage page.
 |
 |
 |
 |
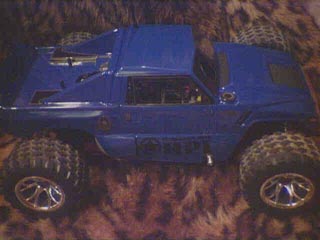
The tiger body after some trimming with mesh grill installed. This body is awaiting some LED buckets for the headlights and brake lights, the paint has already been masked off under the decal.
 |
 |
The JR XR3 receiver has been relocated closer to the antenna mount so that more of the antenna can stick up in the air. The receiver has also been moved on its side and I have noticed improved radio range.

Here is my NMT after an overhaul. Rockette is now outfitted with a fully heavy duty drivetrain that includes: universal front and rear drive shafts, heavy duty crown and bevel gears in front and rear, heavy duty diff outdrives in front and rear and a Powerline 4mm chassis (too keep things stiff).

Since the powerline chassis is a bit narrower than the stock chassis, the battery is left exposed. I fashioned a lexan guard to protect the battery.
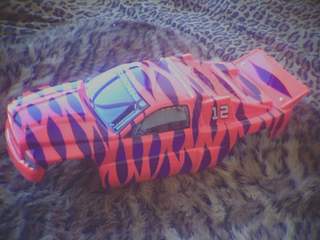
My new tiger body, painted using Pactra spray cans. The main color is fluorescent orange and the stripes are candy purple, everything is backed in sprint white. I made the paint mask myself using 3M masking tape by laying down overlapping strips of tape on a wooden cutting board. I drew the desired stripes and cut them out with a razor blade.
Tip: I masked the headlights and the brake lights so that I can incorporate LED light buckets on a later project. In the meantime, the headlight and brake light decals cover the masked portion.

Mesh material used to simulate a grill has been shoo-goo'd into the Dodge body.

Those Masher 2000 tires sure are big, the large circumference not only increases speed, but it also helps absorb impacts from jumps and terrain.

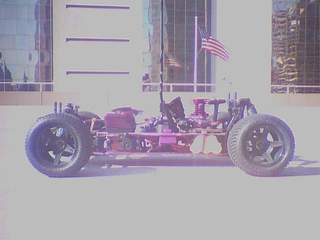
Thie is Rockette in off-road trim.

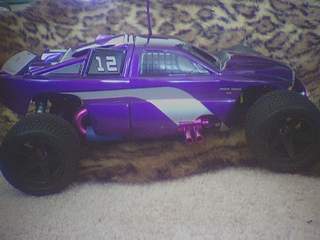
Rockette is one fast NMT. Here she is in on-road trim.
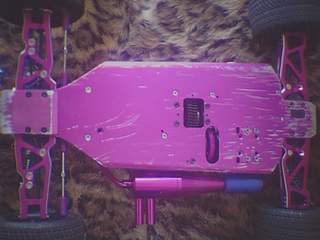
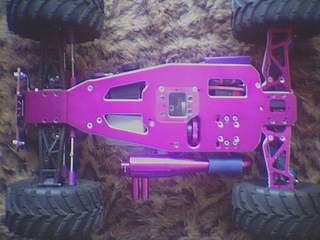
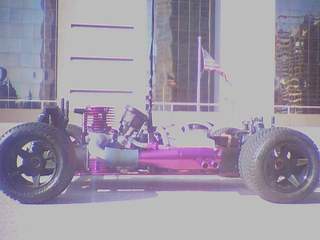
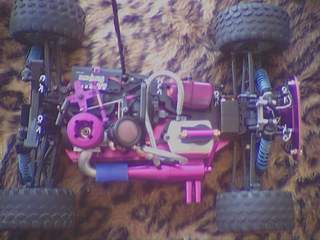
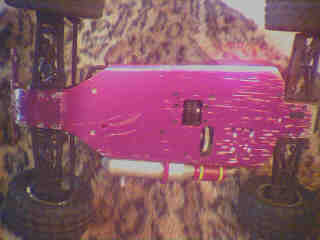
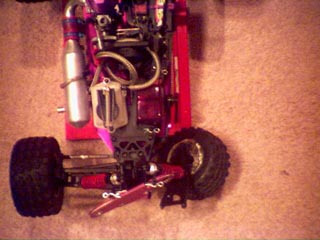
A shot of Rockette's bottom.

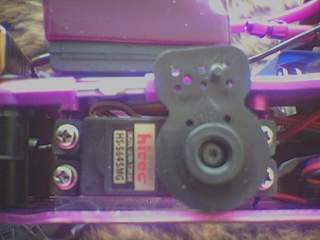
Hitec steering servo (model # 5645mg) with loads of torque. It has a reported 133 oz/in of torque at 6 volts and a .18 second 60 degree turning speed. Since this is a digital servo it has a ridiculous 399 oz/in of holding power. This servo is awesome and I would recommend nothing less. Notice the Kimbrough servo saver # 124, it is much larger than the stock unit and features a stronger spring. This improves steering control by eliminating servo saver flex.


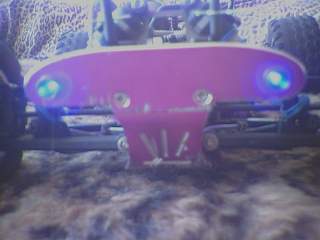
Front and rear aluminum a-arms from Megatech that I hope I don't bend in a crash.
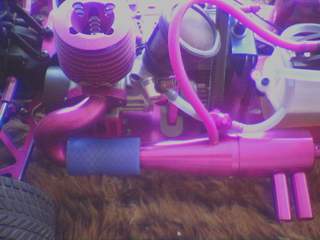
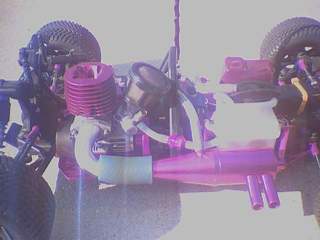
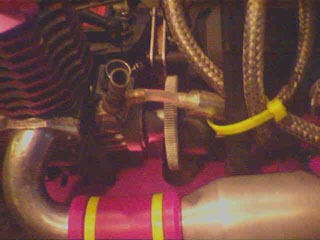
This is a big tube t-maxx header from The Hobby Shop and it blows the CEN header away. I am also using a Dacron Polyster Braid reinforced silicone exhaust coupler from GS Silicone. This coupler is very nice and I don't need to use zip ties to hold everything together.
The GS Silicone fiberglass antenna is a great way to protect the internals during rollovers. I like to use heatshrink tubing to keep the wire in place and also to prevent the lexan body from slicing through the wire.
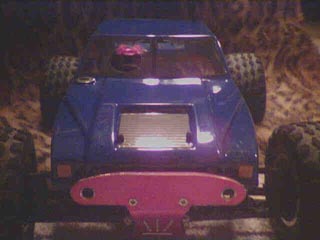
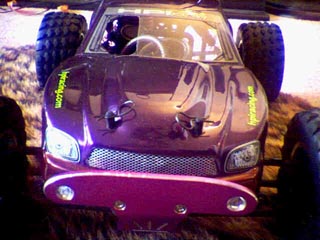
I am currently running this Dodge Ram body painted with Pactra polycarbonate paint. I used purple pearl and silver.

Mmmmm, look at that shiny purple aluminum. Although you can't tell, my truck is actually running in these photos. I have just switched fuels and now use 20% Trinity Nitro Blend rather than O'donnell.
Say, can you see my NMT's stance in this profile shot? The black HPI 5 star rims really accent the road tires.
Right and left angled photos taken from my 3rd floor parking garage. Very smooth surface, but not enough room for a proper course, so all I can do here are short speed runs and limited maneuvering.

The Pro-Line Road Hawg II road tires provide plenty of grip.
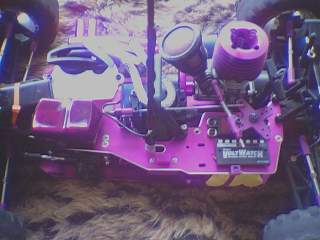
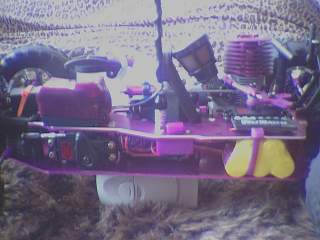
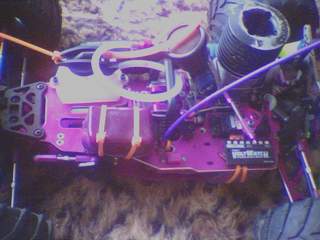
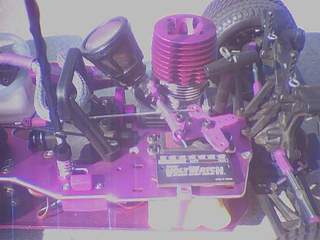
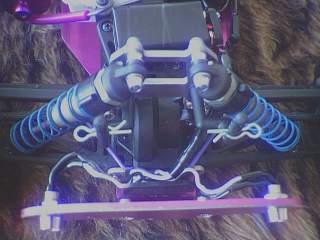
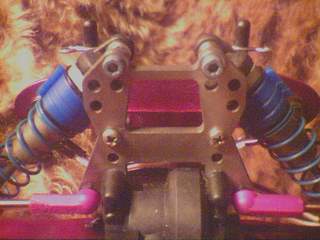
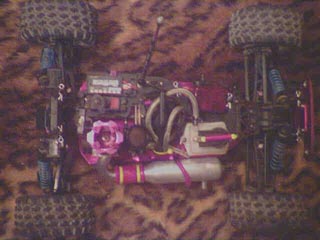
The Powerline aluminum upperdeck significantly stiffens the chassis and gives the NMT a new personality. You'll also notice the GS silicone switch cover as well as Lunsford titanium turnbuckles holding RPM heavy duty ball cups. I've switched to the racer fuel tank because of its improved fuel inlet and outlet pressure fittings. There is also no primer; but then again, I would remove the primer even if it came on the tank.

Because my flywheel was rubbing against my fiber brake disk I moved the brake to the front of the truck. This solution presented another problem all of itself; namely, the risk of spilling fuel onto the brake disk. I fashioned a splash guard out of spare lexan.
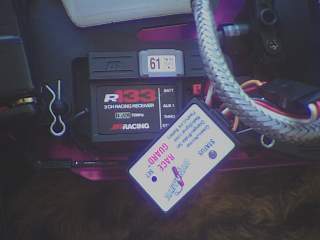
Under a purple cover I protect my receiver and Dynamite failsafe.
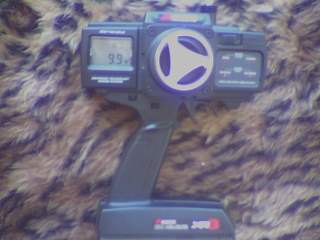
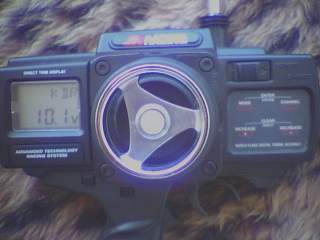
This is my JR XR3 radio. This radio is dope and I highly recommend it to everyone. You can get it's specs here: Horizon Hobby. I got my radio from Dalton Raceway.

Close-up of insides.
The LED lights enable me to see where my NMT is in the dark. I got the LED's, wiring, resistor, light buckets, and 9 volt battery plug at Radio Shack. Go to my tipz page to find out how to wire them yourself.

Rockette is mesmerizing.
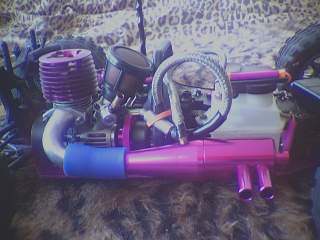
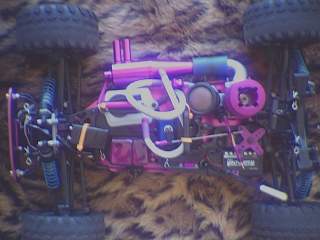
You'll see the Evo II sitting all snug on the Wolfpack aluminum heat sink motor mounts and Wolfpack vented flywheel. This .12 powerhouse is outfitted with both a slide carb and a pull-start. In my opinion, the convenience of a pull-start outweighs the performance loss. There is a .21 motor saver air filter that provides the engine with clean air. You can also see my linkage set-up using an OFNA slide carb linkage kit. I also installed a custom brake linkage. You can see more about my Evo II and my slide carb set-up on my "engine" page.
Here are the two 49 and 52 tooth spur gears for the 2 speed transmission. There is nothing cooler than hearing your nitro-powered vehicle shifting gears. Sounds like this: vvvrrrROOOMMM shift VVVRRROOOMMM.
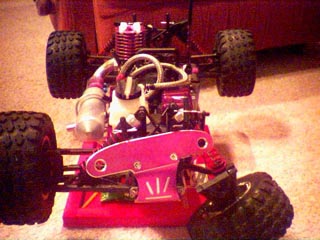
This titanium shock tower is indestructible, never again will I fear breaking a shock tower.
If you plan on using steel braided hose then I recommend you put a piece of clear fuel tubing at the end so you can see whether the fuel has gotten to the carb while priming.
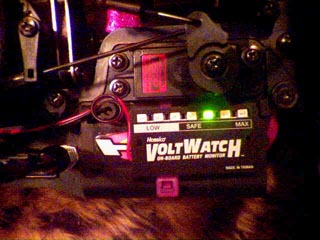
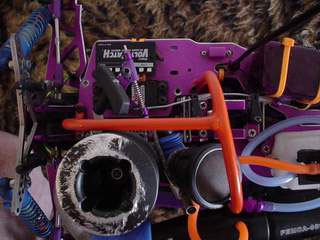
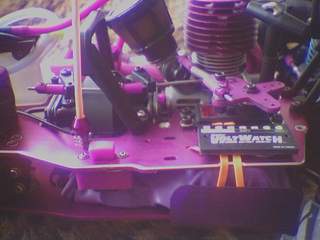
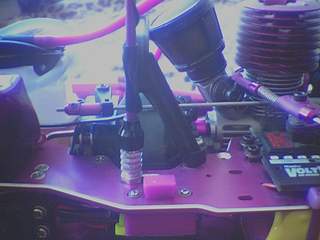
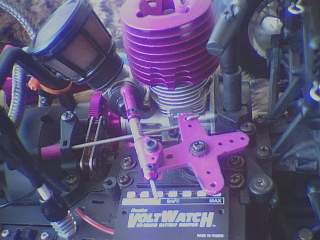
This is the nifty Voltwatch voltage checker that I use to know when to charge my 6 volt NiMH batteries. A very handy device because the last thing you want is your throttle servo stuck on wide open throttle!
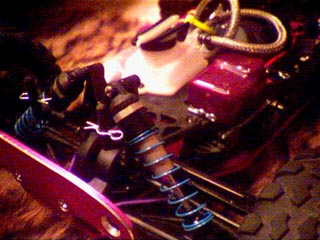
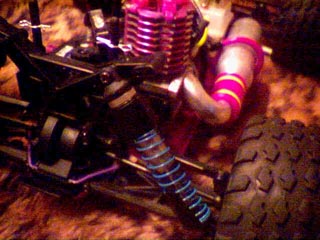
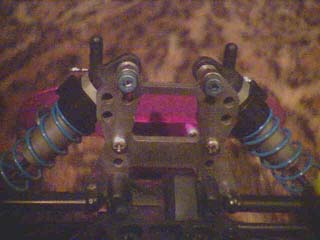
This is a close-up of the front and rear suspension set-ups. You'll see that I have upgraded to Associated aluminum shocks and blue springs all the way around. Notice the sway bar (highly recommended).
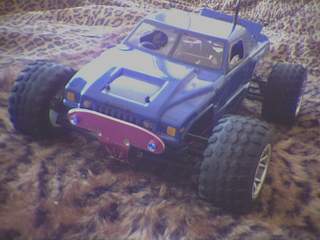
This is the top, side and front of my NMT with the MX-1 Hummer body.
This is my NMT after repairs from my runaway incident.
This is what happens when you don't extend your radio's antenna without a failsafe or a throttle return spring. The damage: bumper is mangled, the left a-arm is cracked, the hinge pin is bent, the shock tower is cracked in two places, the shock popped, and a ball stud ripped out of the steering knuckle.

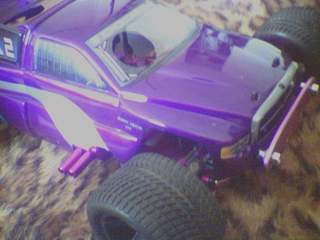
This is a picture of my NMT with the stock body. Notice the huge aluminum Megatech bumper and the mesh material that I used to simulate a grill. Very trick!